
Welcome to my blog for the Creative Life Scrapbooking Fall Blog Hop. I am excited to share with you my project! 🙂
After you’ve had a chance to browse through my scrapbook layout idea, please continue to scroll to the bottom of the page to find the link to the next CSL Design Team Member’s blog. 🙂
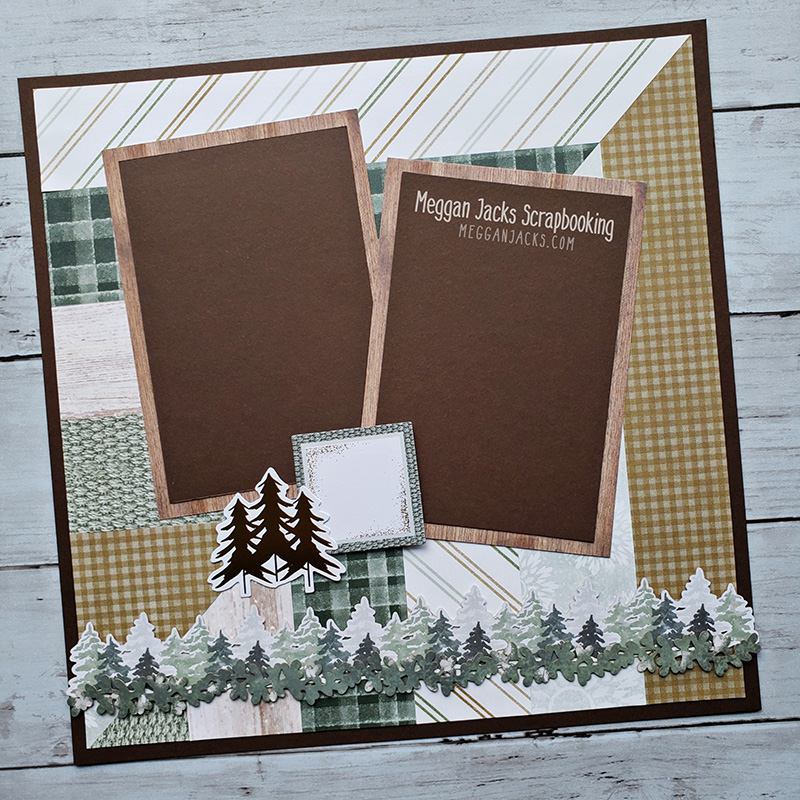
I am pushing the “fall†boundaries a bit with using the Winter Woods collection. However, I live in Western Washington and after the wind blows all the leaves off the trees, we are left with the beautiful evergreens that are highlighted in the Winter Woods collection and still have a month left before winter arrives! Event better – this page can be done with ANY collection and you can easily mix and match collections to use up scraps.
Three Helpful, Non-Creative Memories Tools
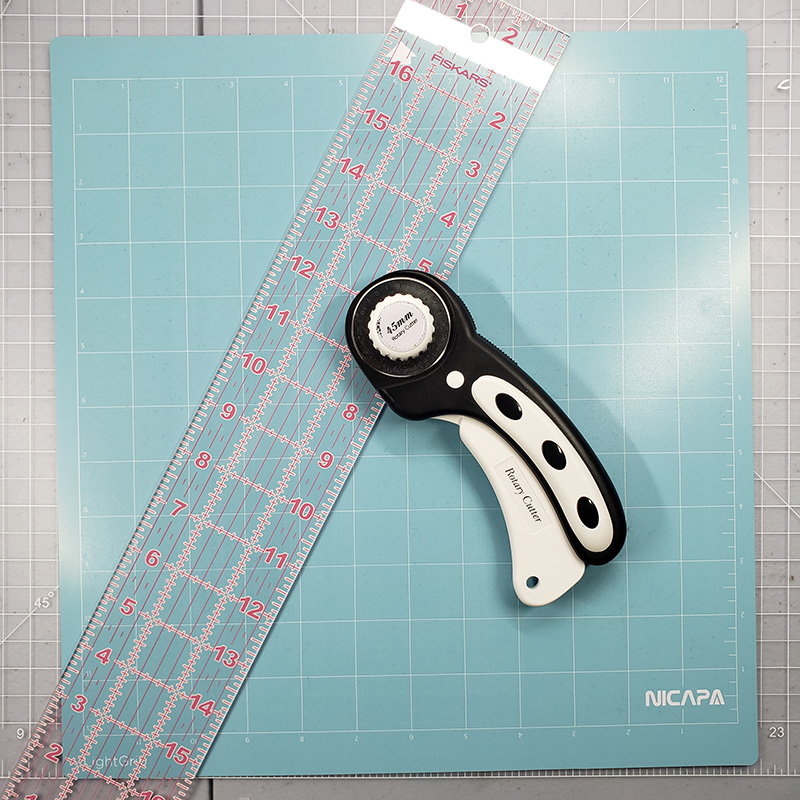
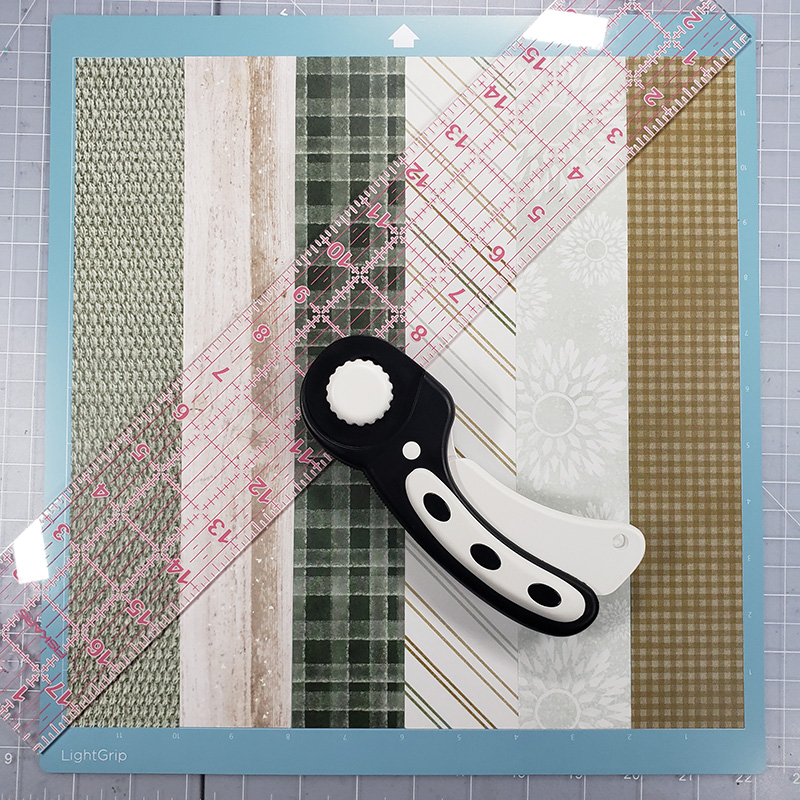
In this project I will introduce three non-Creative Memories tools that I have found helpful in my scrapbooking. The first two items were acquired because I prefer to avoid folding and unfolding my paper whenever possible. I wanted to make a diagonal cut on my 12 inch paper but the CM trimmer is not long enough. So, I bought a Fiskars 18 inch ruler and hand held rotary trimmer and can now easily make all those awkward diagonal cuts my trimmer cannot quite handle.
The third item is one I already own and use with my Silhouette Cameo, but decided to try using with my rotary trimmer and it was what made this project easy! I used my 12 inch Nicapa Light Grip cutting mat to hold the strips while I cut them with the handheld rotary trimmer.
So easy.
Now – with all that being said. This project IS possible without those three tools. There are numerous other ways to use the above tools for scrapbooking projects (so I think they are a good investment), but if you want to make this project TODAY and don’t have those tools, no sweat. You will just need to measure, mark and cut each strip individually. There are only 6 strips, so it won’t take too long. 🙂
Creative Memories Supplies
- Winter Woods Decorative Collection – Papers, Variety Mat Pack, Laser Cut Embellishments and Laser Cut Borders
- Dark Brown Cardstock
- Adhesive
This project shows six, 2-inch strips from the Winter Woods collection. I used 3 different papers, cutting two strips from each of the three papers. I considered using the gorgeous deep green paper with the light brown rustic texture (opposite side is the wood rounds) but I felt it was a bit too “heavy†for the other papers I was using. Since I am creating a background that will already be a bit busier than normal I decided to set that paper aside for another project.
Directions with Sticky mat, Handheld Rotary Trimmer and 18 inch ruler:
- Cut six, two-inch strips of paper. Make sure you like both sides of the paper.
- Play with the order of your paper to make sure you like how the reverse side will look with the opposite piece. This is where working with paper from a single collection works great. If you need to, you can mix in cardstock to help.
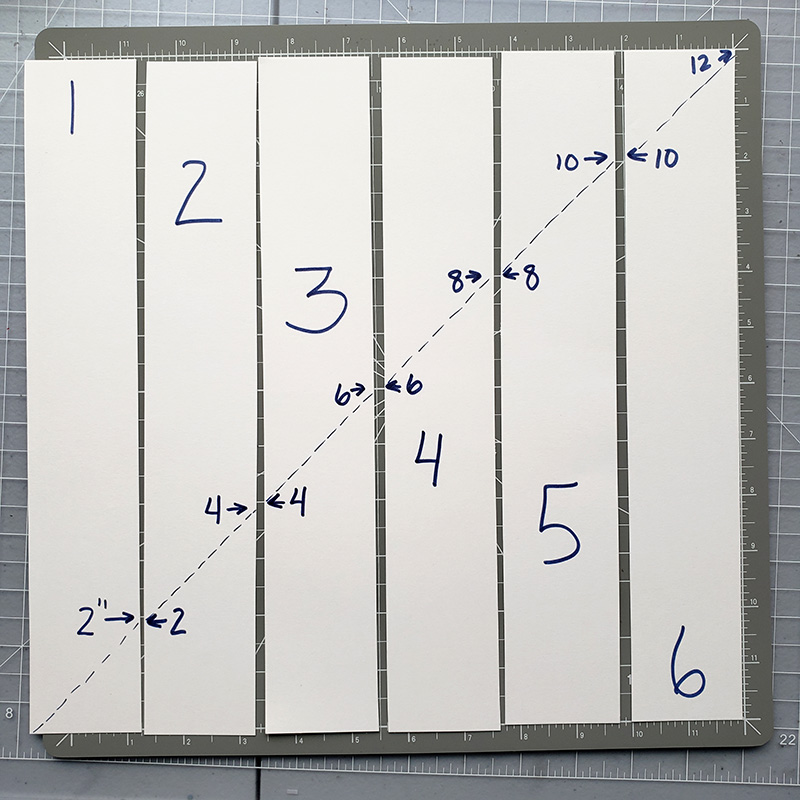
- Line up the papers on the adhesive mat. Be sure to fit them together tightly as possible without overlap.
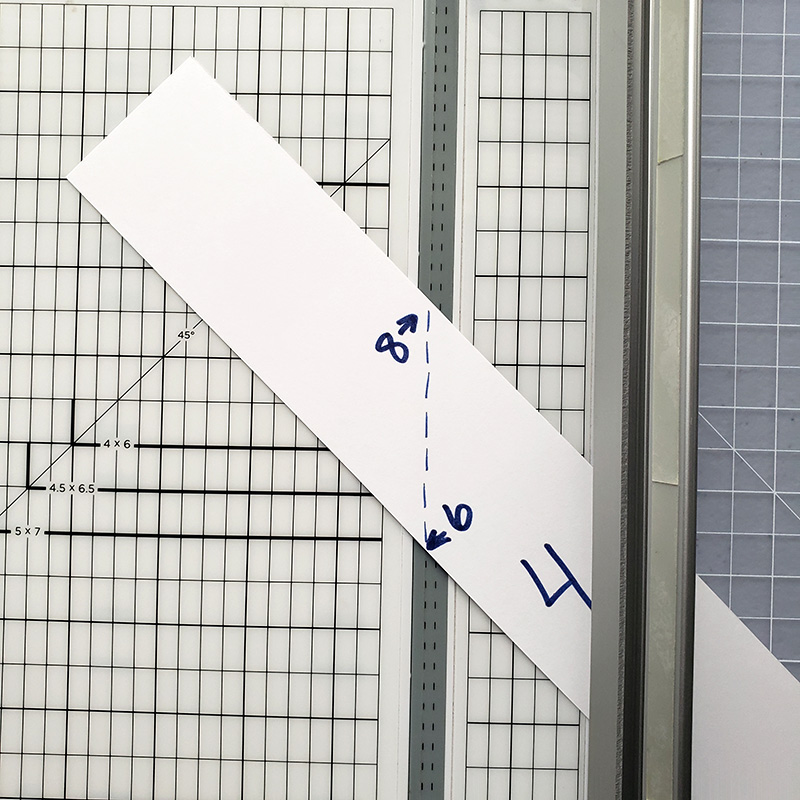
- Line up the 18 inch ruler from corner to corner and run the Handheld Rotary Trimmer along the edge of the ruler to make the cut. You do not need to press down hard with the handheld trimmer – especially when cutting designer paper. You may want to practice on scrap paper first if you haven’t used a handheld trimmer before.
- Adhere the lower portions of the strips to a piece of 12×12 paper or cardstock.
- Flip the top portions of the strips over and adhere them to the paper as shown in the photo.
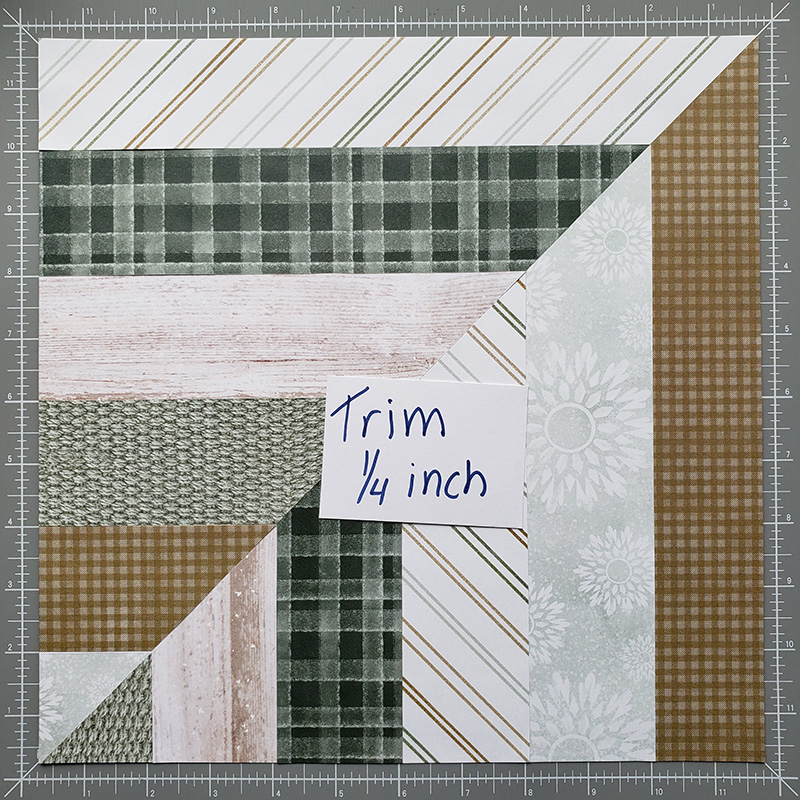
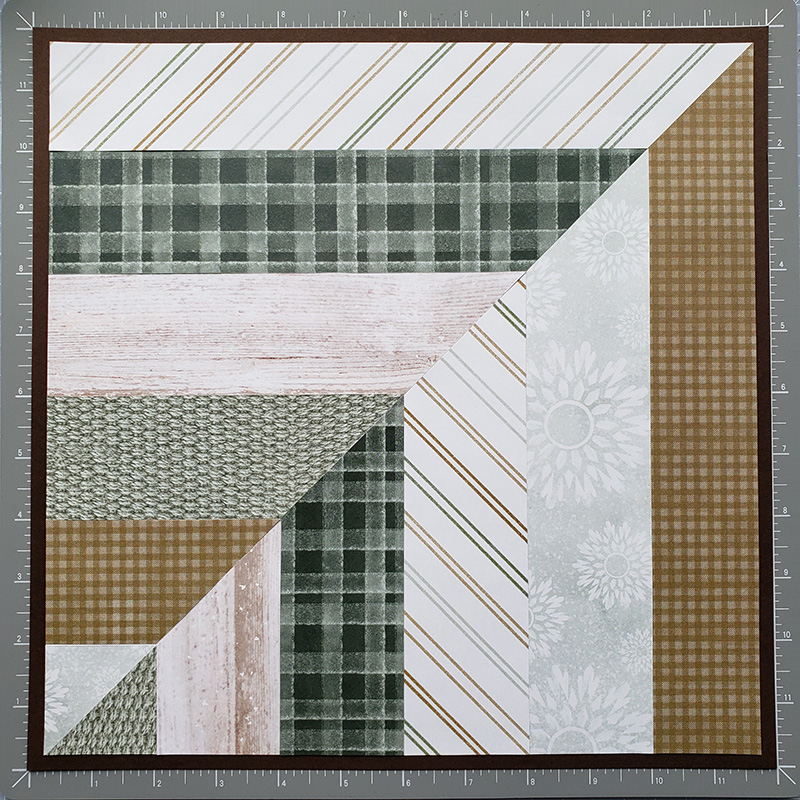
- Trim off ¼ inch from all sides of the paper (optional – but I like how it cleaned up any rough edges.) Adhere to a piece of contrasting cardstock or designer paper to give a frame effect.
- Final design is shown with two 4.5×6.5 inch mats framing two 4×6 photos. I added various decorative elements from the Winter Woods collection as accent pieces.
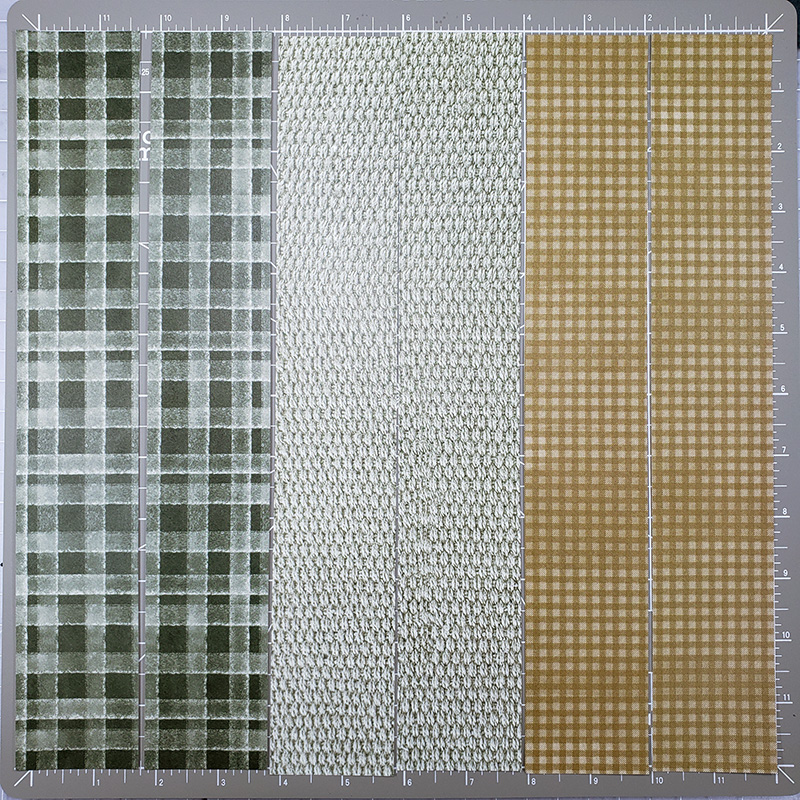
Line up the papers on the adhesive mat. Be sure to fit them together tightly as possible without overlap.
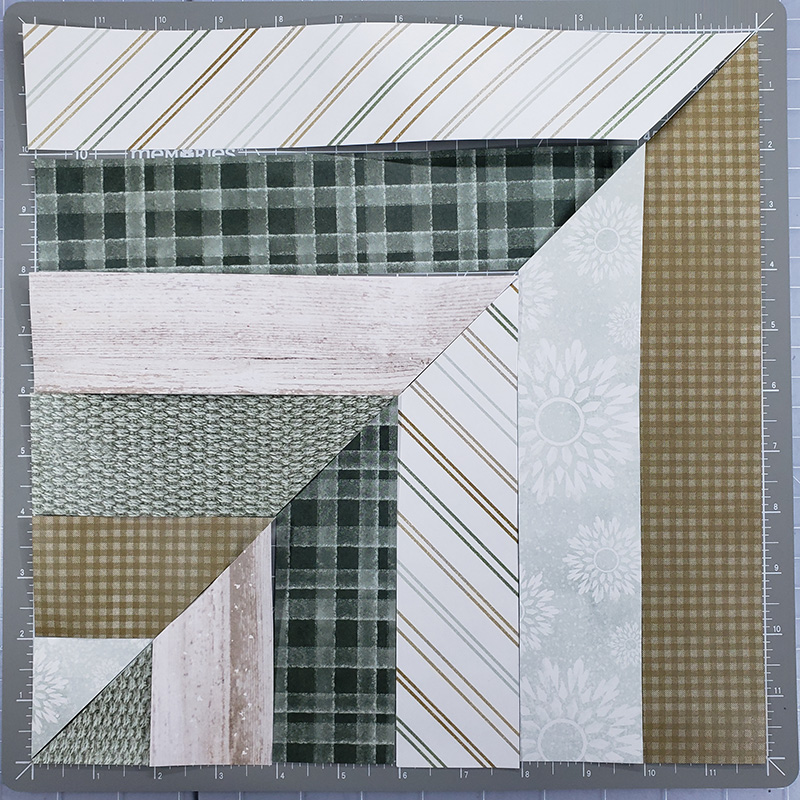
Flip the top portions of the strips over and adhere them to the paper as shown in the photo.
Directions for cutting without sticky mat and rotary trimmer
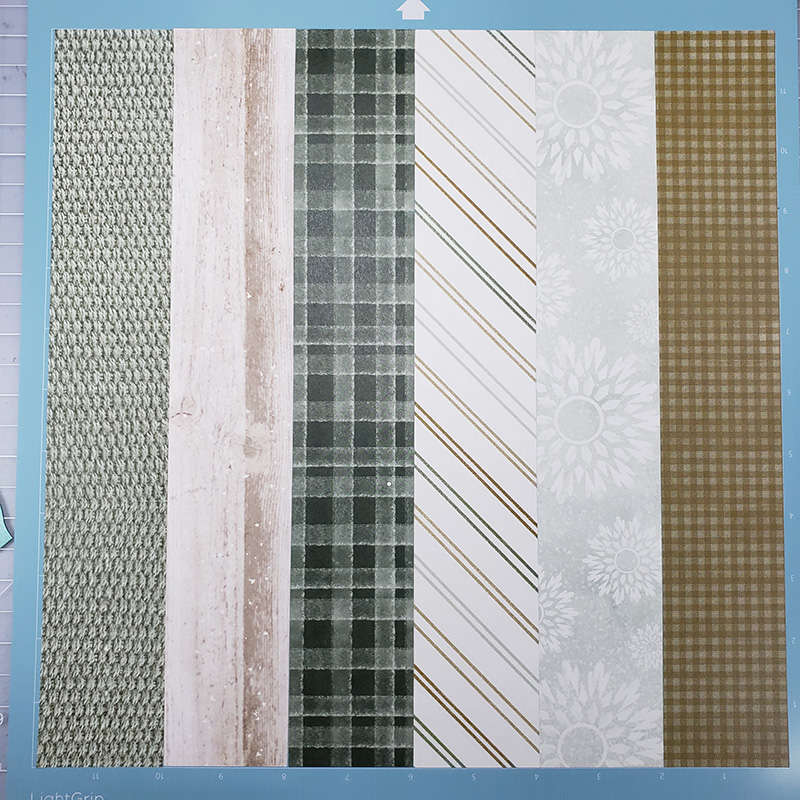
From left to right, pieces are numbered 1-6
- Piece 1: Measure and cut from 0-2″
- Piece 2: Measure and cut from 2-4″
- Piece 3: Measure and cut from 4-6″
- Piece 4: Measure and Cut from 6-8″
- Piece 5: Measure and cut from 8-10″
- Piece 6: Measure and cut from 10-12″
Creative Life Scrapbooking Fall Blog Hop
If you landed here from Scrapbooking with Krista, I appreciate you stopping by! Next up in the Creative Life Scrapbooking Fall Blog Hop is Karyn Crops so be sure to hop on over there to see her project. Krista French – Scrappin’ with Krista <– Previous
Meggan Jacks Scrapbooking <– You are here
Karyn McDermaid-Rolf – Karyn Crops <—Next
Diana Brinsley – D. Brinsley’s Memory Keeping Blog
Tessa Chapple – Tessa Scrapbooks
Fran Smitherman – Celebrating Your Beautiful Life

Your directions are always clear. Thanks for adding the helpful measurements. I appreciate the non CM tools. I have one of them already and possibly one other.
Love this Meggan! I have those tools and never thought to use them for my scrapbooking!
This looks amazing! I’m loving the trees!
This is amazing! I’m so in love the tree border punch so much!
Love this technique! I came home from work and I had to make this immediately! Thank you for sharing!
Wow! What an interesting background! Looks hard, but I’m game to try it!!
What a great idea! Thanks!
Meggan Jack’s, another beautiful layout. Do you recommend the Silhouette Cameo? What all do you use it for? You do such wonderful layout with just the CM products, do you find that it adds a lot to your scrapbooking to justify the expense?
Thanks again for sharing your amazing creativity.
Julie Jorgensen